Skill 4 – User Orientated Design

Today we have started to learn our 4th and final skill: Designing a clear and structured interface to make it easy to finding relevant information. There are lots and lots of different interfaces out there. Some of them with a great design/concept, but sadly the majority of them aren’t thought through at all. This is crucial in many cases when it comes to finding information quickly and effortless.

In our workshop we’ve been assigned to different areas of research. I’ll be looking at apps around “commuting”.


Research

When searching for “app communting” you quickly find sites using catchwords like “10 Excellent Apps“,16 Super Useful Apps” and “5 Commuter Apps you should not live without“. However, just looking at the designs I already dislike most of the Apps. Also you find very different things when looking for commuter apps. It goes from music to listen to, books to read, games to play to where did I park my car, what is the fastest way from A to B, where’s the next gas station etc.

I’ve got two examples to show:
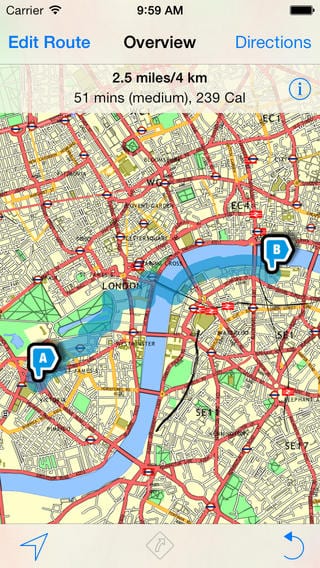
 

walkitlogo     Walkit is in my opinion a great example for an awful App. First of all I do like the Idea. It is an App that suggest walking routes if you want to go from A to B but also circular routes if you just simply want to go for a walk. You can choose between a direct route or a ‘less busy’ one that will try and avoid major roads and favour off-road paths through parks and by waterways.

However you can only use it in 40+ cities and UK only. If you look at the maps beneath you don’t really feel motivated at all. It looks very clustered and even though they tried to make it look colourful it just looks confusing more than anything. I like the design of the A and B signs but they don’t fit in with the rest of the style. But what annoys me the most is how they show the route. The blue line is way to wide, you have no idea where it’s taking you along because it not only covers the road you’re walking on but roads around it as well.
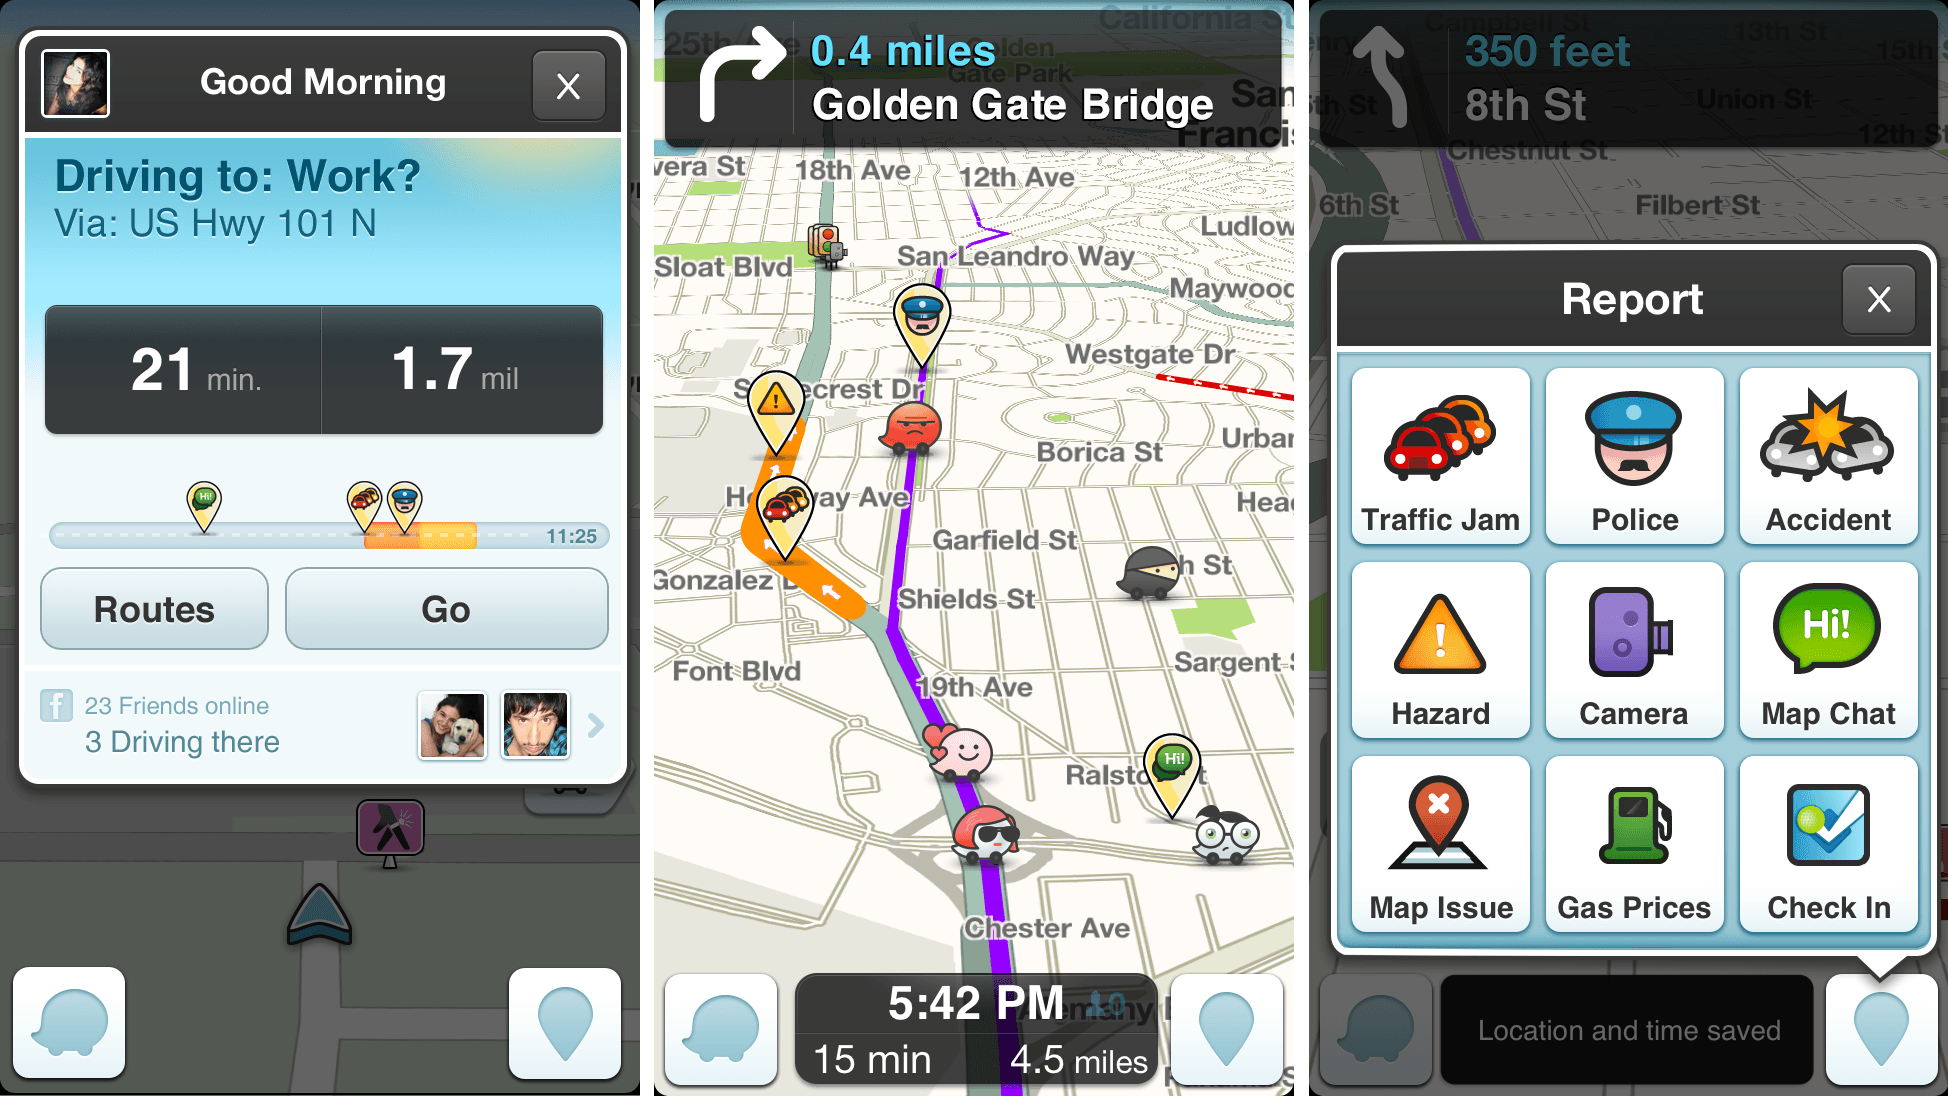
walkit walkit2

waze logoWaze on the other hand is quite a fun and handy commuter app. It is a worldwide bases traffic and navigation app that allows users to interact with each other. Users can share where speed camaras are placed, police and traffic as well as gas prices. You can also coordinate your ride with other waze users. Waze have their own map system which gets updated and improved all the time. The video below is a good introduction to all it’s functions.

http://youtu.be/R8WKW0xeBxU

Waze is the only app I could find were I liked the idea and the design. It is simple and clear which makes it easy to navigate. The little icons are fun but not in the way and it’s interactive which make you feel much more part of it.

waze-iphone

Skill 3 – Folding Letters

Homework for today was to draw a net for the first letter of our name and a building of our choice. The building I went for is the “Hamburger Rathaus” (Hamburg city hall). The scale is obviously not right but I think the basic folding system I intendet will work.

hamburgerrathaus

However we didn’t use the building in the workshop for quite obvious time reasons but I’m really tempted to try and create it when I’ve got time.

We recreated the letter net in Illustrator. While you’ve got to align the sides in a way that they don’t overlap, when you design it on paper, you can have a different layout when working digitally. We created the different parts of the letter on separate layers and opened them up in After Effects.

Using our skills we learnt last year we made the object fold up over time in a 3D space. Later on we could then insert the letter in a short video.

Using movement tracking for the video we could them combine our letter with certain points so that it moves around with the objects in the video.

It it’s not perfect by far but still a cool little thing to be able to do.


Skill 3 – Motion Graphics/ Visual Effects

I loved loved loved this workshop! It was basically “only” a refreshment of our learnt skills from last year but with some small additional steps. It is obviously great to learn new skills but working with knowledge you already have and updating that… I just don’t feel as big of an idiot. I know what I’m doing, I’m good at it (most of the time) and it’s just simply fun!

We started of cutting up the robot below. Because different parts are covered up by other body parts, we had to fix that by drawing and copying in the missing bits. With all the different body parts on different layers we could now import our robot in to After Effects and start animating him.

ROBOT ROBOTcutup

The first two steps were to place the anchor points and parent the different parts to each other. By parenting the body and the the legs to a null object the robot was also able to rock from side to side. The background we used is a picture of the Lincoln cathedral. To place the robot in to the middle of the town we masked the houses in the foreground and placed the robot between the front and background image. We parented the null object and the two images with another null object which moves up and down every time the robot moves forwards that that it looks like the earth is shaking.

Later on I added some sound to make it all more dramatic and voilà this is what it looks like:


Skill 2 – Ideas and Research 2/2

The next step is to find a way to add sound to the interactive floor. What I have thought of is this:

Every footstep triggers a sound instead of a light maybe even in edition to the lights, adding visuals always makes things better. Depending on were you are in the room the sound changes from higher to lower notes on the y-axis and the kind of sound on the x- axis (see below, left). So that when someone walks across the room they will e.g. go down a musical scale. A similar concept is used for this Matrix (below,right). Do check it out cause it’s really fun to play around with and “make music”.

floor footsteps floor matrix

If possible an even floor just like a huge touch screen would be perfect. But I know that’ll be difficult and expensive to achieve. Another way to do it would be like in the video below using wires across the floor for every note. This way one could still achieve some sort of evenness, but you would only have the run from high to low notes (only the y-axis) and I don’t know if one could include visuals anymore.

Or one could have different panels. A friend and me went to an exhibition where one of the installations was this room (below). On a big screen they showed you which panels to step on. It would then take a picture of the room and print it out and generate a new random pattern to recreate with the panels. Most people pinned their picture to the wall but I decided to keep mine. I’m glad I did! With panels you could have the y and x-axis but it’s quite a visible thing compared to a touch-screen-kind-of-floor. I don’t really know what the greater good of such a floor is but it would be great fun and would get people of all ages together, interacting with each other and making music together!

instellation


Skill 2 – Ideas and Research 1/2

I had this idea of an interactive floor for some time now. The concept is fairly easy but I think it might be difficult to realise. When you walk across the floor, every footstep triggers a light. The light spreads and fades so that you can’t only see where someone has walked along but also how long ago. I can imagine this kind of floor being great in a gallery or museum. Obviously it works better the darker the room is to make the lights more visible. It could look something like this:

NPG Gallery Record - Gallery Interior Photograph – Born Digital

Looking at the different categories (see last post) we could choose from, “lights on floor” didn’t really fit in with any of them. Since I’m not only interested in visuals but also music/sound I started researching in that area. I remembered an exhibition my dad was telling me about in the Science Museum in London but because I didn’t know when it was or what the name was that memento didn’t really help. However looking for it I did find some other really cool things. My favorite one is demonstrated in the video below. Sound Fountain is an installation which captures and replays sounds in the space in which it is placed. More about it here.

What I love about this is that it’s almost philosophical. Every single person and every single sound contributes to the whole thing. Everyone is important  and no one is forgotten, even when there is no one left in the room.